Popular blog posts
Recent forum posts
Discussion Forum
Discussion forumReimagining the most obscure video game ever made - Part 1
Post #: 296
Post type: Blog post
Date: 2022-10-28 05:23:08.000
Author: Jeremy Reimer
Tags:
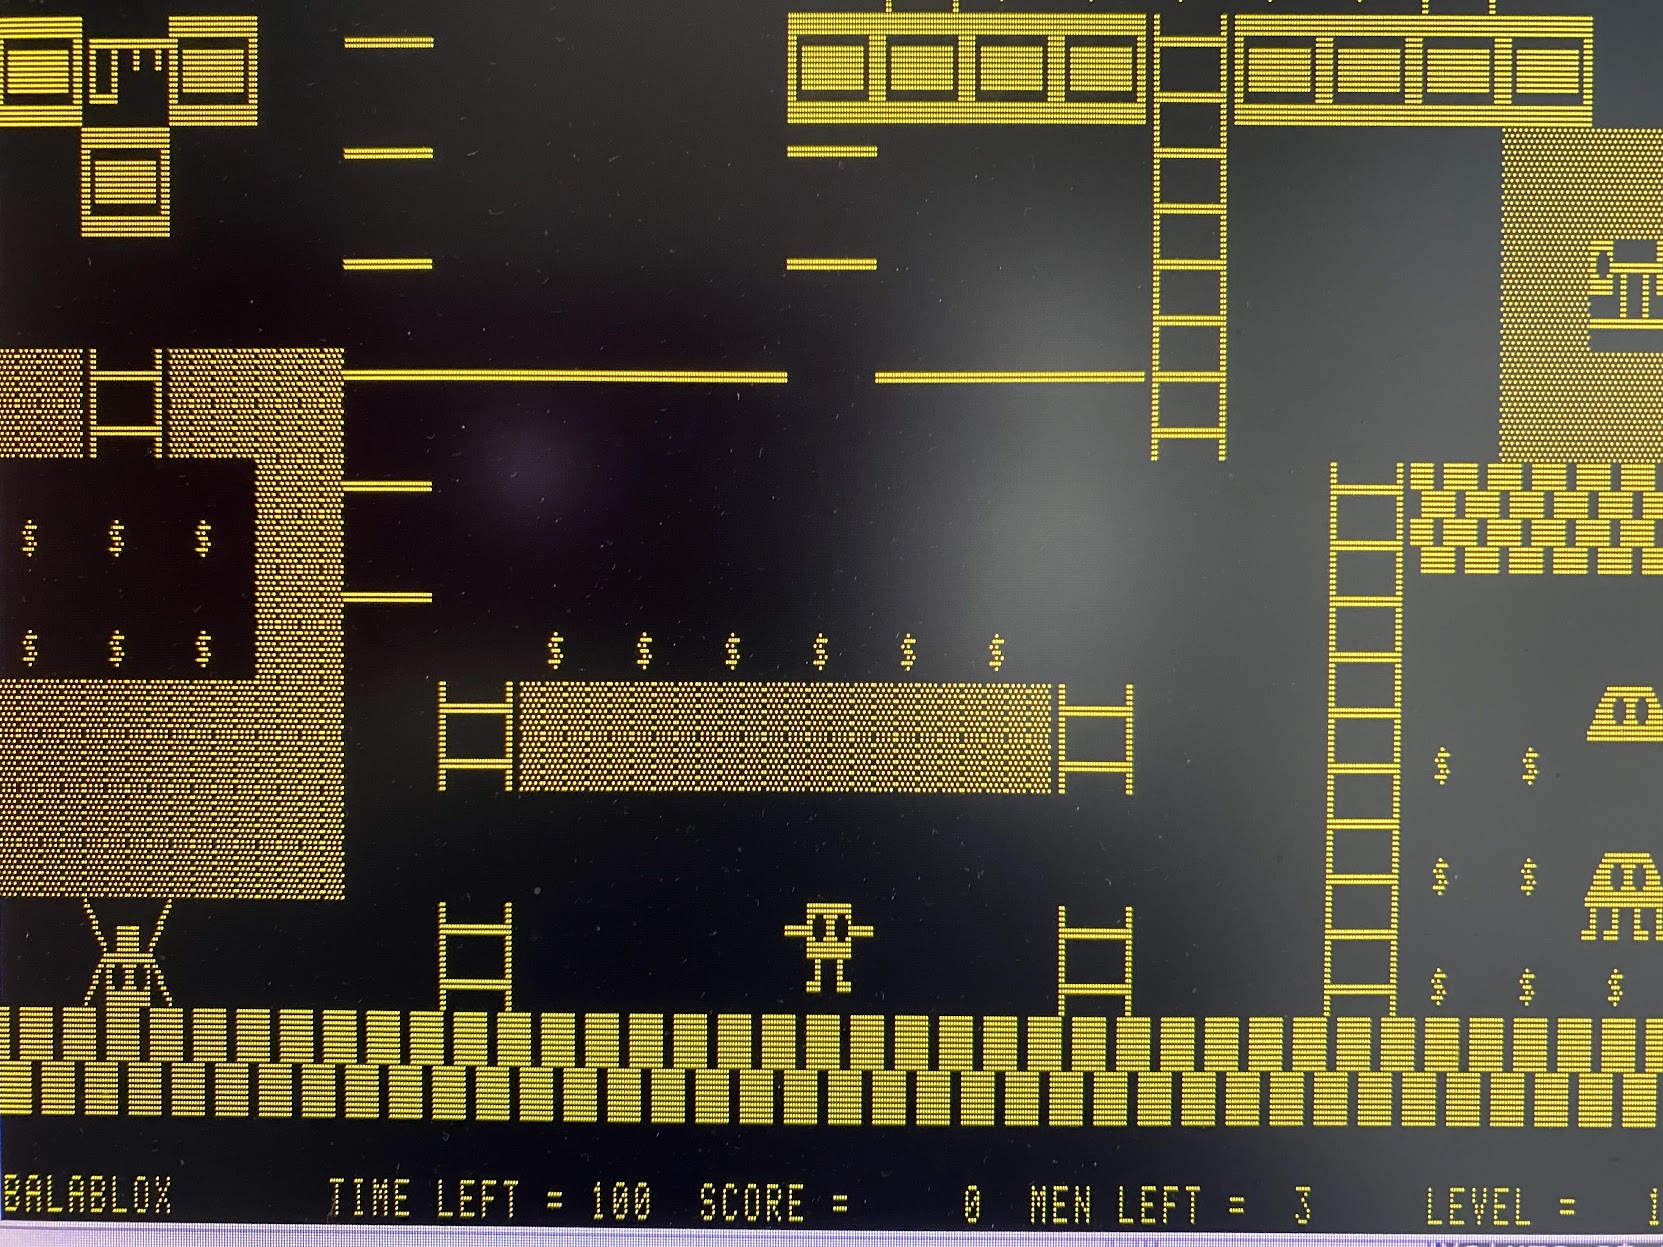
The original game, running on my Heathkit H-89
A while back, I wrote about the most obscure video game ever made, called Balablox, which I wrote when I was 15 years old in 1987. At the end of the article, I teased the possibility of a modern rewrite.
I’ve been working on that project, on and off, for about half a year now. My goal is to get it finished this year, for the 35th anniversary of the game. It’s been a ton of fun. To celebrate, I decided to write a series of articles about how I made the game, and what I’ve learned through the experience.
Everyone agrees that developing games is hard, but why is that? Don’t we have much better tools and languages now than we did back then? How hard could it be to make a simple game in 2022? Read on to find out!
Choosing an engine
These days, the first thing you do when you decide to make a game is to pick an engine. Game engines didn’t exist 35 years ago—every game was made from scratch. Today, the most popular game engines are Unity and Unreal. But these engines are ridiculously powerful, and take years to master. They’re designed so you can make any sort of game, including modern AAA titles with advanced 3D graphics and multiplayer support. They’re a bit overkill for what I wanted to make—a simple single-player game with very simple 2D graphics.
I ended up choosing GameMaker Studio 2. I made this decision after watching a series of YouTube videos where Yahtzee Croshaw (of Zero Punctuation fame) created 12 games in 12 months. A month to write a simple game? That seemed achievable.
My first steps working in GameMaker Studio 2
In the end, no matter which engine you choose, you should commit to it. You can end up spending months just playing around with different engines, or reading endless forum discussions about which one is better. All this is time that you aren’t making a game. And whatever you do, don’t switch engines mid-stream!
First things first
GameMaker Studio, like any of the game engines, takes a while to get used to. Because it’s based around 2D images, or “sprites”, it has a sprite editor built in. So the first thing to do is create a sprite for the player character.
Balablox was built on my ancient Heathkit H-89, which only supported character-based graphics. In any case, the characters were supposed to be blocky, like the cartoon that inspired it. So I stuck with a simple rectangle to start, and attached stick arms and legs. But using the power of pixels, I added large expressive eyes. That felt like a good compromise between the old and the new.
Editing the player sprite
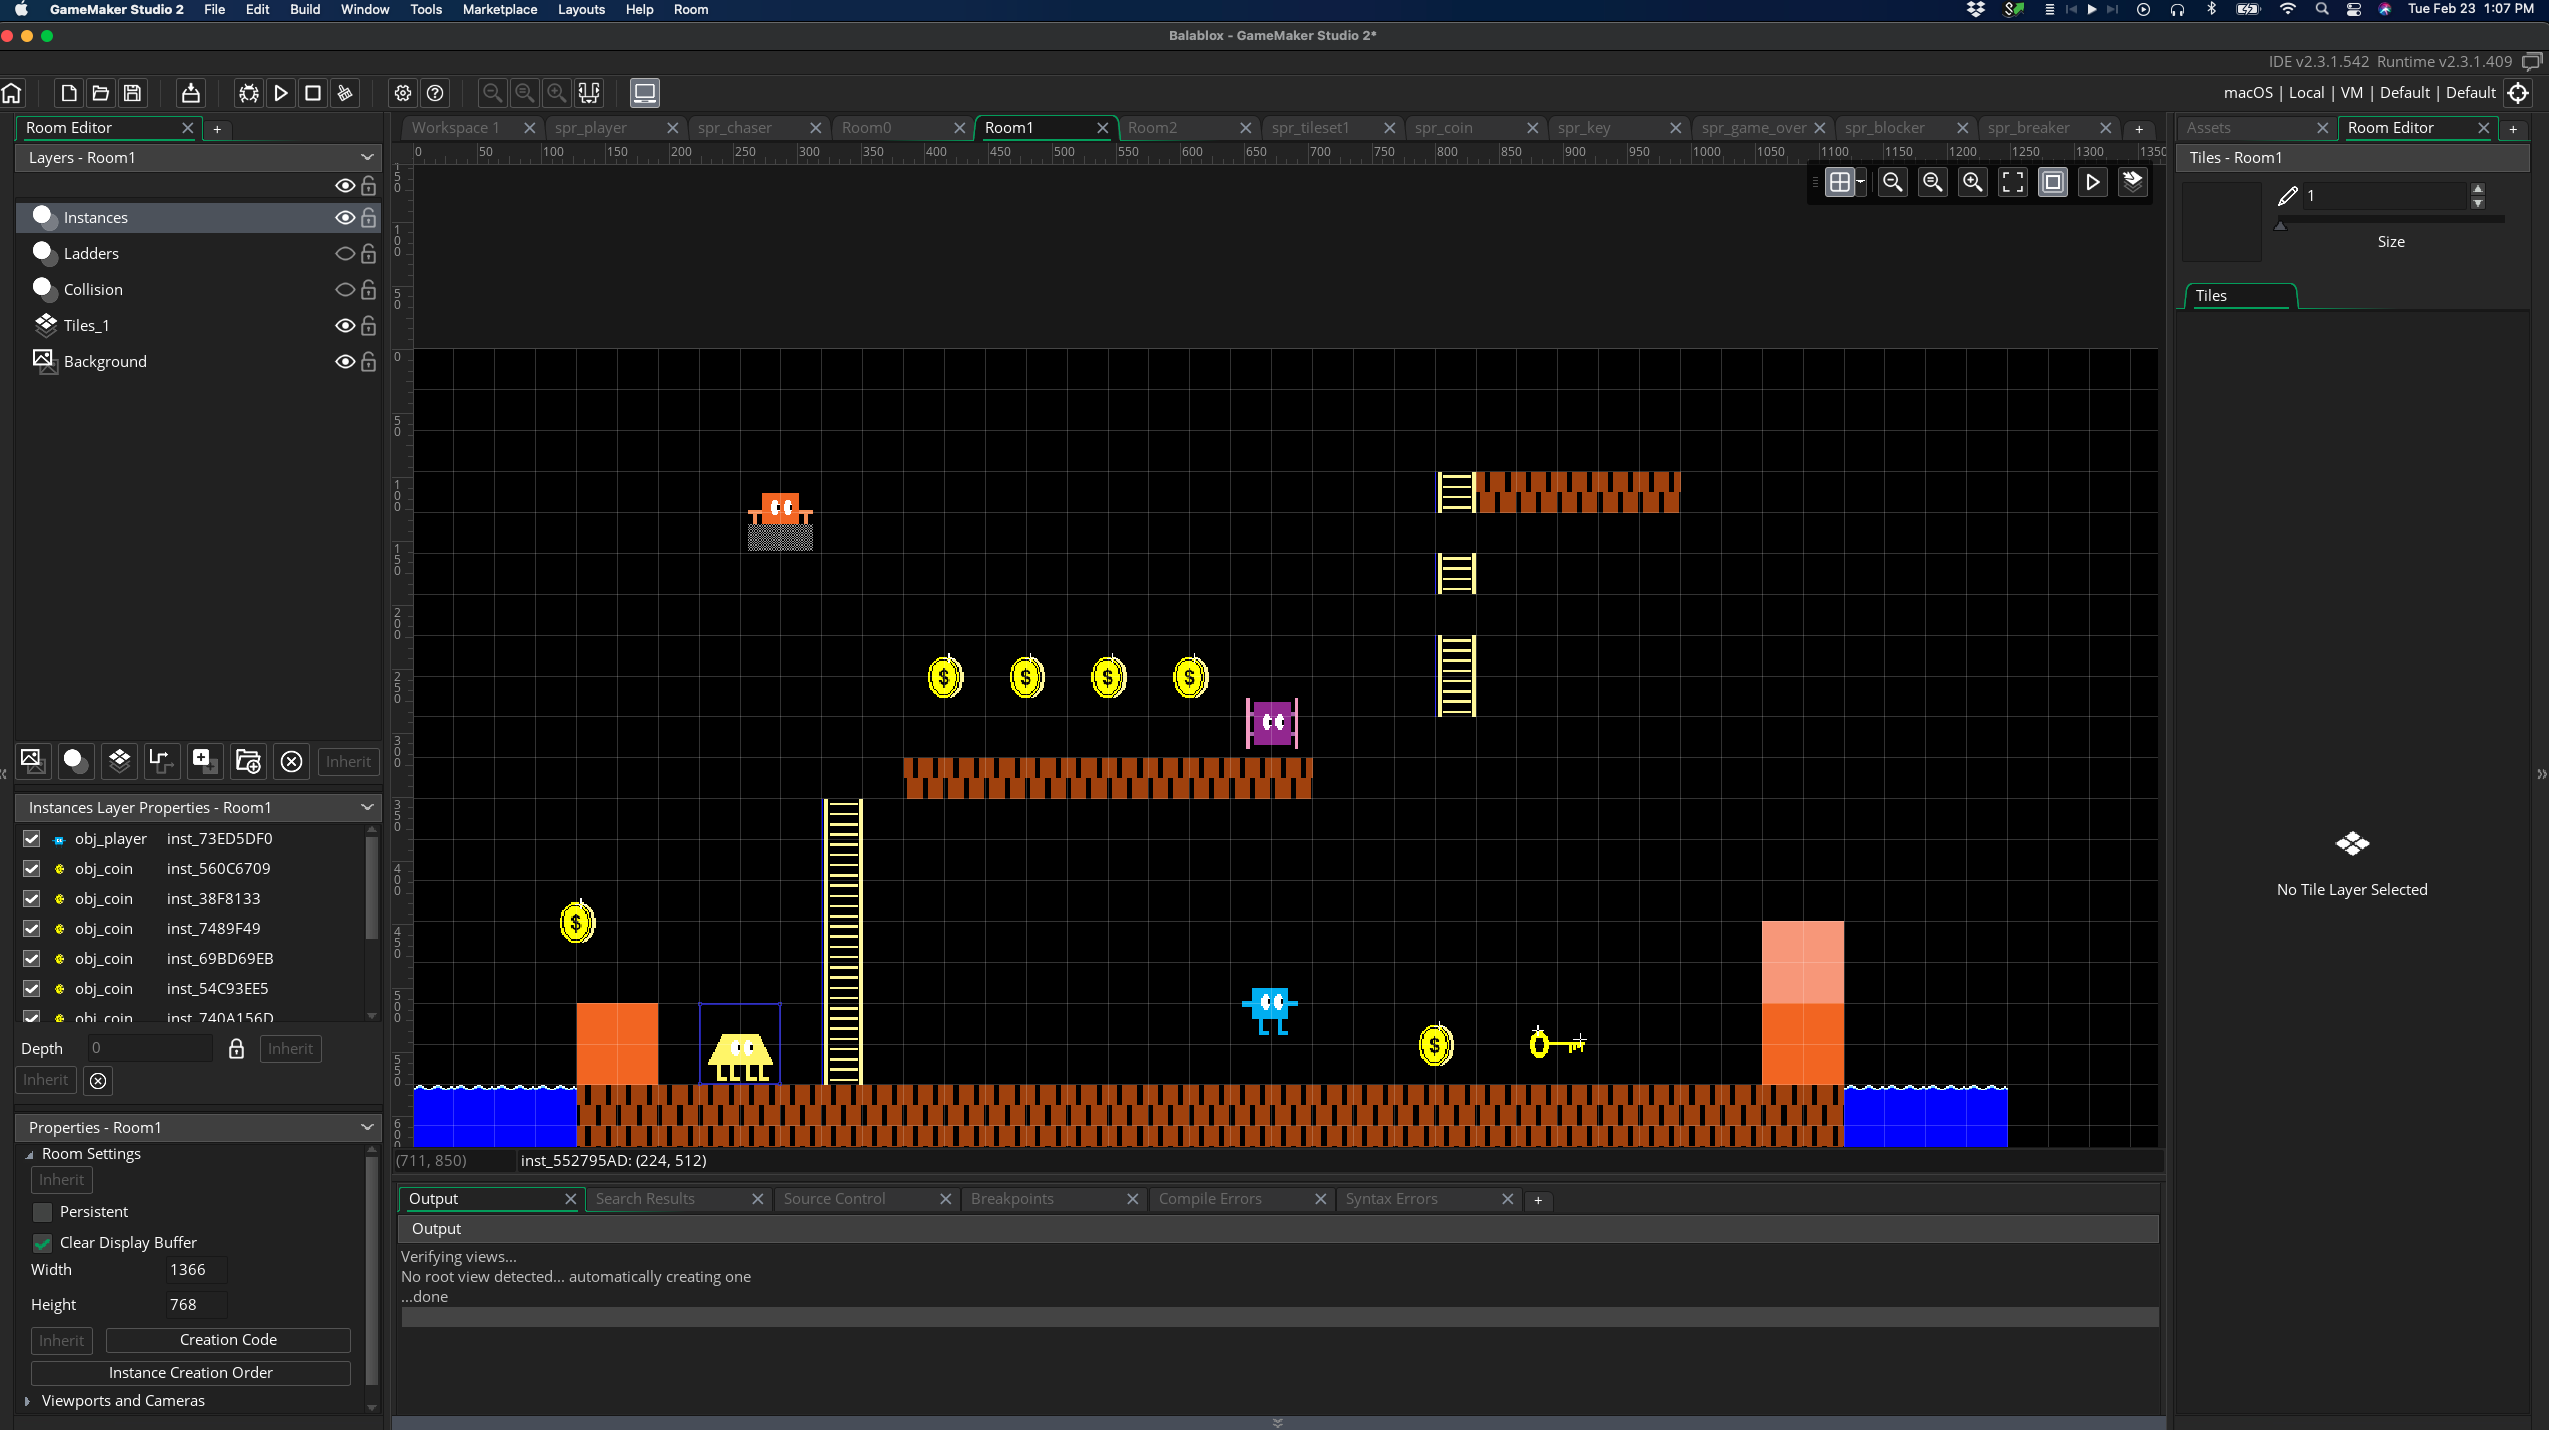
How big should the sprite be? On my laptop’s screen, 32 by 32 pixels looked about right, and it’s a nice computer-y number to use. Done! Now I could make an “object” that used this sprite and place it on the screen grid for the first level, or “Room”.
But an empty room isn’t any fun to play in. GameMaker lets you design levels the same way people did in the original Nintendo days—as grids of tiles. I wanted a bit more granularity for the room tiles, so I made them 16 by 16. This seemingly innocent choice would cause me a lot of headaches later!
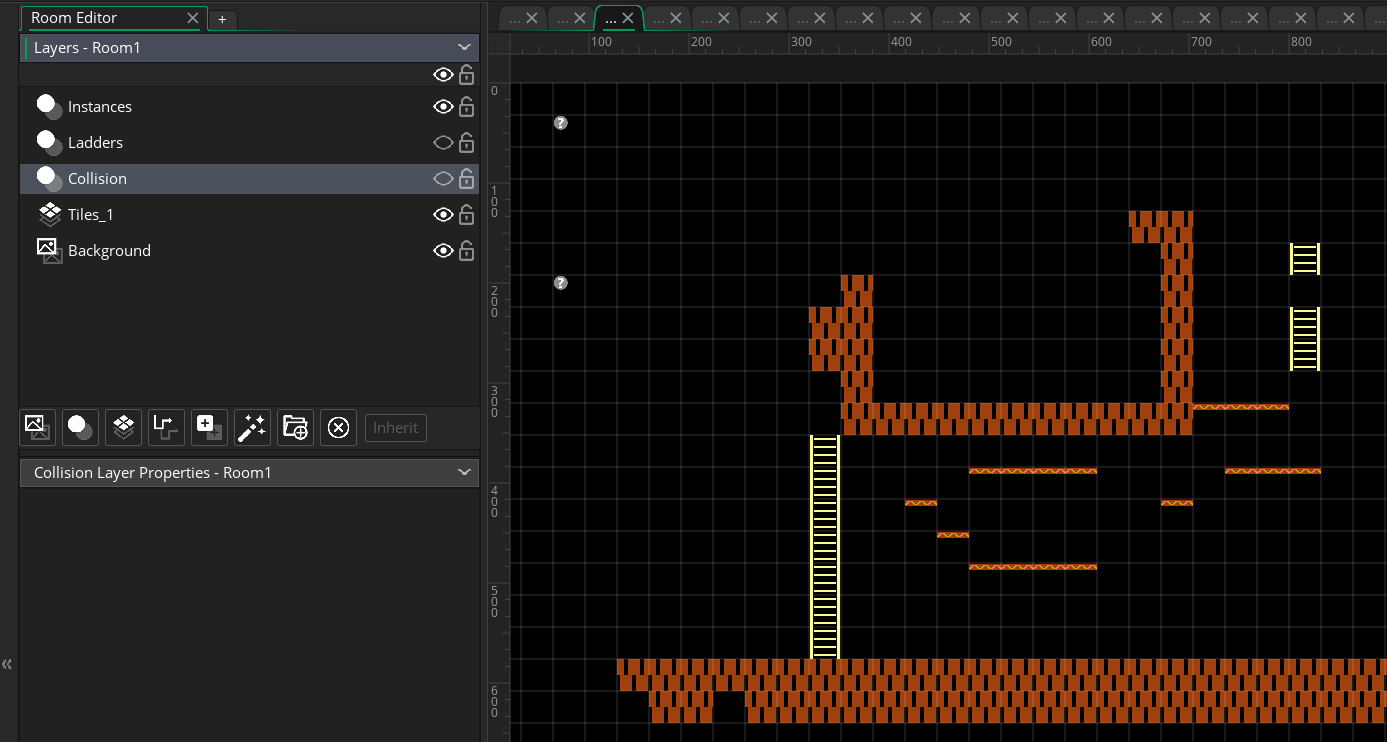
The tile editor works a bit like Photoshop, in that you can define different layers that are displayed on top of each other. The room tiles are usually the lowest layer, followed by a layer for “Collision” objects that define what you can and can’t bump into. You put collision objects on top of any part of the level that you don’t want the player to pass through. Then you set the Collision layer to be invisible. The top layer contains the objects themselves, including the player object.
Working with layers in the Room Editor
Movement
The player needs to be able to control this object, so I added some code to check if the left or right arrow keys had been pressed, and set a direction of motion variable if they were. Then for each frame of animation, called a “Step” in GameMaker, I added code to check the direction variable and update the position of the character. But before it moves the player, it first checks if that movement will collide with an object on the Collision layer.
What about vertical movement? When the player hits the jump button, I add a negative vertical movement speed variable. To simulate gravity, I slowly increase this variable in each step. I also check to see if this movement will collide with a collider object.
I wanted to include ladders, which are a special form of vertical movement. This required an additional invisible layer in the room, which I called “Ladders”. If the player “collides” with a ladder collider object, it changes the vertical movement speed to be steady in whatever direction the player chooses.
Enemies
This was all well and good, but we need enemies to give the player a challenge. This is where the object-oriented nature of GameMaker’s coding language (GML for short) comes in handy. You can define a generalized “enemy” object, give it some default values for movement speed, and write the code that will make sure it too doesn’t run into walls. Then for each individual enemy, you create a new object that’s a “child” of the Enemy object. It will inherit all these default attributes, but you can add a sprite image and special code for any unique behaviors.
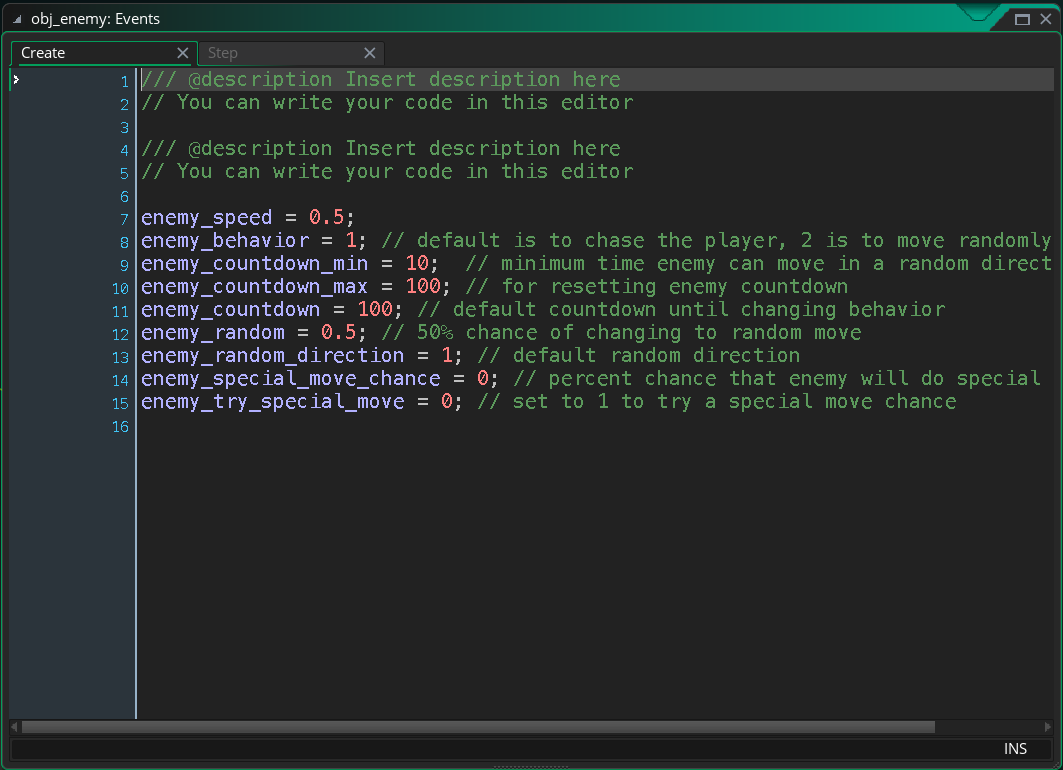
Setting the initial startup variables for the default enemy object
In the original game, I had some very simple code that took a random number between 0 and 1. If it was below 0.5, the enemy would move towards the player. If it was above 0.5, it would move in a random direction. This same strategy still worked in my modern game, although I had to add a timer variable so that the enemy would stick with one direction for a while and not just wiggle about.

The code for default enemy movement
I added a few other niceties, like coins for the player to collect, and ropes for the player to hang on. I also added the Key object, which when touched, advances the player to the next room.
Because the graphics were very simple, and the code was also simple, it didn’t take long to put all of this together. I didn’t keep a log of my time, but it was only a couple of weeks of work, a few hours at a time. And at this point, I had something that looked a lot like a complete game—it had a player-controlled character, it had platforming challenges, it had enemies and things to collect—surely finishing it would just be a matter of a bit of polishing, right? How long could that take?
Oh, you sweet summer child.
Stay tuned for Part 2!
View this post in the forums
Views: 2420